New Bloggy Home

New Blog Home

I’ve been keeping a little secret for about a year now.

Wow, how time passes.  I have wanted to get a dot com for years but the natural one to get which is thenestingspot.com was owned by a subsidiary of a certain internet provider and to get it from them you had to pay insanely high fees.  It really seemed like a racket.  Anyway, by chance I happened to check on it last fall and saw the spot was up for renewal and thankfully we were able to stealthily nab it.

I waited until after the craziness of the holiday season to try and figure out how to make a website for it.  Web page stuff is still pretty big and new to me so it took months before I found a format I thought I could use to do what I wanted and around May I finally got it in decent shape.  And then I got busy with other stuff and it has sat there.  I’ve been hesitant to tell everyone because it never feels quite ready.   But after doing a couple other things recently I think it’s time to make the move.  So, if you follow me in a reader like Bloglovin or Feedly etc. please take a minute to change your feed to www.thenestingspot.com.  If you are already a subscriber to my blog through WordPress then I’ll move you myself later today.  Hopefully all will go well and you won’t even see a big change. If you have any problems please let me know.

If you haven’t subscribed before a couple of ways to do it are: hit the RSS button at the top right corner of the new blog.  Or sign up in the right sidebar of the blog page to get an email sending you each new post.  Or go to your own reader like Bloglovin and search for The Nesting Spot.  Both blogs will come up so make sure to follow the correct one.

The site is still pretty simple and I’ll try to change and update the look as I figure out how, but for now it is clean and has the necessities.

I am posting a tutorial on my daughter’s Halloween costume today so please be sure to pop over!  It is also part of a Halloween craft link up so you can check out the other tutorials as well.  I will also be listing my 2014 ornaments this week and will notify you on there as well.  So please jump over and take a look and follow along!

Baa Baa Black Sheep

little lamb

Over Labor Day weekend I spent the evenings sewing two stuffed animals for two different babies.

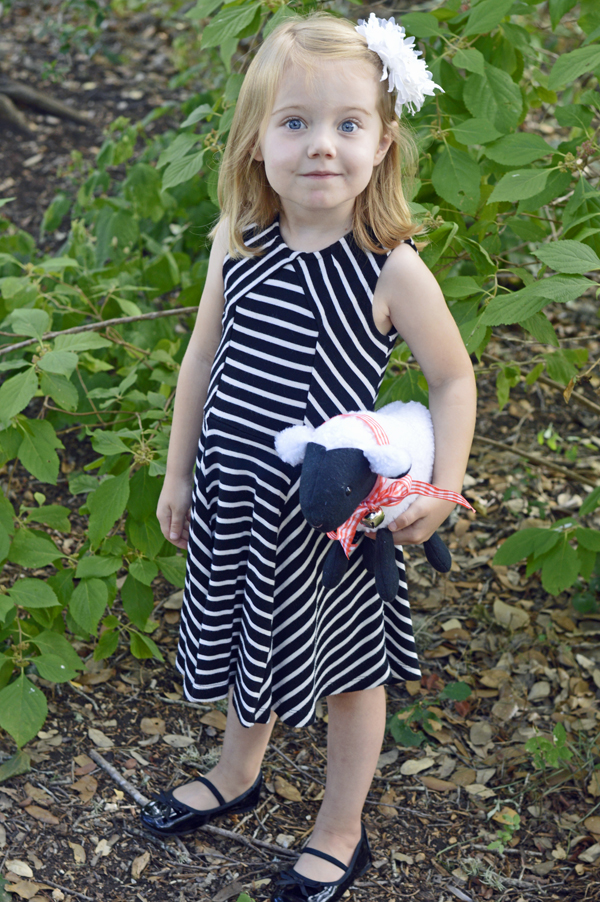
The first one was for a sweet little girl that was born a few weeks ago.  She is the first girl in a household full of boys.  I had seen the free pattern for a little sheep recently by Abby Glassenberg for Sew Mama Sew and had pinned it on Pinterest to remember it for later.  (I have a bunch of great free patterns for stuffed animals pinned on there!)  I figured this could be a great time to try out the pattern.  It looked like a simple pattern that wouldn’t take too long but is also super adorable.

little lamb

I really enjoyed making this little lamb.  It was fun picking out the fabric and really making her my own.  The one that Abby made has embroidered eyes, nose, and mouth but I really wanted to use safety eyes.  And I just embroidered a little nose.  That is one of the great reasons to sew, you can customize things just the way you want them.  I also tied a ribbon around her neck to add some color.  I added a bell on the ribbon too which looks cute and is fun to hear ring but I told the mom that if she doesn’t want to hear it or worries that the ribbon is a choking hazard she can always just take it off and save it for when her daughter is older.

little lamb

little lamb sewing pattern lamb face

I hope the little one who received it will have fun playing and snuggling with her.

reading to little lamb reading to little lamb

little lamb

If you have never sewn an animal before this would be a great one to try.  It’s free,  so if you just completely fail (which I don’t imagine you would) you aren’t out money on the pattern.  There are good step by step instructions and photos which help you along the way.

Abby makes gorgeous patterns and in fact the other animal I made is one of  hers as well from her book Stuffed Animals.  I’ll show you that one next week.

And while we are talking about her patterns.  She just made one for Wild Olive.  It’s a free pattern for a flying squirrel and it is the cutest thing I’ve seen in a while!  I definitely have to find a reason to make one soon.


And So It Begins

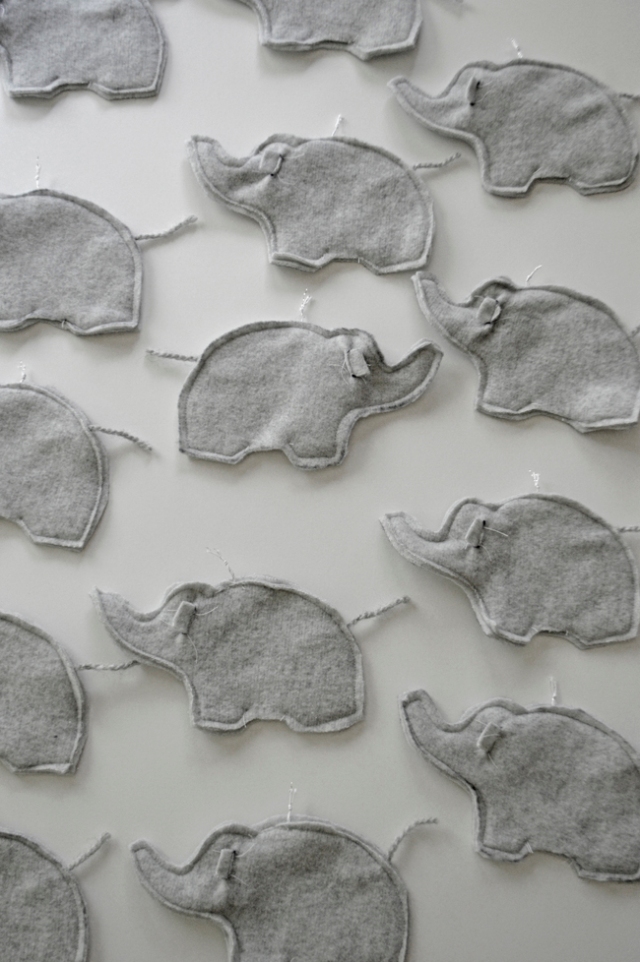
insides of elephant ornaments

Well, it’s that time of year again.  No, not back to school or the winding down of summer, it’s time to be making Christmas ornaments.  If I don’t start making them at least by mid summer there’s no way I can make them all in time so that they are ready for the rush once October and November hit.  With more homework now that my oldest is a big first grader (WHAT?!)  and with the birthdays of my youngest turning 2 at the end of this month and my oldest turning 7 in November, and with making Halloween costumes ahead of time so they can be shared on line in time, and Thanksgiving, and tons of family coming over to stay with us over the next few months, well, I just have to pretend it isn’t 100 degrees outside right now and get into the Christmas spirit.

One thing in my favor is that I am finally not pregnant, nursing, or dealing with the sleep issues of a newborn so I have high hopes that everything will get done earlier than ever this year.  I’ve gotten in a good pace these last couple weeks so I just need to keep it up so I can enjoy myself during the holidays instead of being holed up sewing.

This year I am introducing some new animals to my collection.  They are a whale, bear, dove, and sheep.  Plus my ever popular elephant and rabbit will of course be available.  I still have some of my classic shaped ones, octopi, and moons available as well.  My hope is to get them made and photographed to be listed this month.  There are some very organized people in the world who already started contacting me about ornaments back in July.  Wish I could be that on top of things.

I hope you all had a relaxing summer.  I loved not having the structure that comes with school.  We could keep the kids up a bit later if we wanted to go do something fun and not worry about waking up the next morning to be somewhere.  There were also no lunches that had to be made ahead of time and I didn’t have to wake the little kids up from nap to pick up brother from school.   It is nice having the house a bit quieter now that there is one less child in the house during the day though.

We did a bit of traveling this summer.  My husband is a youth and college minister at a church and so summer is his busiest time.  He is usually gone a good bit of it with going to camp and multiple mission trips and retreats etc.  This year though the camp had extra space and so the kids and I tagged along and stayed in a separate motel like room.  It was a bit hard at times trying to keep them happy with us all in one room.  And I didn’t want them to change the experience for the youth but we got in a groove and had a fun time.  I also got to go on a trip to West Virginia with the high schoolers which is my first trip away from the kids since my oldest was 8 months old.  We drove through Mississippi so we could leave the kids with my parents and then kept on going to West Virginia.  It is such a beautiful place.  Everyone was so friendly.  It is always so interesting to travel to different places and see how people are so similar but also so different.  And to also see if stereotypes are close to reality.  We helped one church paint their old sanctuary (with super high ceilings) that has now become a youth room.  They had told the youth 7 years ago that they’d paint those old paneled walls but haven’t had the chance to do it, so it was nice refreshing that space for them.  We also helped a tiny church in an old coal camp do a little backyard bible club for some neighborhood kids.  It was all a lot of fun and hard work.   I’ve missed getting to go on these things.  The kids had a great time too and got to see all their grandparents at some point which was nice.

So, we survived all that and now are settling into our new schedule of being in school.  And it’s to the grindstone I go with all these little ornaments.  I also just sewed two stuffed animals as baby gifts that I’ll be sharing here soon.  I already gave one away and next week will give away the other.  I was on top of things and actually got photos taken of them this time before I give them away.

*The picture at the top is a look at the inside of my little elephant ornaments.  It’s a view not usually seen by most.


So, did you have any adventures this summer?  Are you glad to be back in the school routine or hating it?  Have you done anything creative lately?  I’d love to hear!

Baby Gift Idea: Crib Art

Awhile back, my mom made another gift for our littlest, William.  It is a bumper of sorts to put in his crib.  But it wasn’t made for the reasons bumpers are usually made, it’s like a piece of soft art for him to look at while he’s stuck in his crib.  She thought it would be a fun way to introduce some animals to him.

I thought I’d show it to you since the idea of it wouldn’t be hard to recreate.

animal bumper artFor the purposes of taking pictures I hung the bumper on the outside of the crib but normally it would hang on the inside.  Although, it could actually be used on the outside as well for the child to look at while they crawl around the room and learn to pull up on things.  This would be especially good if there was already a bumper being used in the crib.

My mom used different background fabrics for each animal but if you wanted to keep it simple you could use just one long piece of fabric cut the width of the crib.  Sandwich some batting in the middle of two pieces of fabric and you’d have your background.

As you can see the animals are basic silhouette shapes and then just sewn on with pretty stitches from a sewing machine.  You could do this by googling animal silhouette images.  Then just print out the shape and use it for a pattern.  Another idea would be to use fabric that has images on it that you like.  You could cut out those images and then sew them on.

Some of the animals also have a few details that are embroidered on.  See the pictures below of the butterfly and the cat.

To attach it to the crib there is ribbon sewn into the seam of each end to tie around the rungs.  I would recommend putting  in at least one more in the middle as well if not a couple to keep it from drooping.

You can really do as little or as much as you want with a project like this.  Even a beginner could have fun playing with the machine to see what they can do. Part of the charm of a handmade item is seeing the little imperfections and signs that it was made with love.

animal bumper art bird squirrel butterfly fish cat

The Nesting Spot…for Mockingbirds

A little mockingbird, which also happens to be the state bird, made it’s nest in the japanese yew by our front door.  We don’t use our front door most of the time so it went unnoticed for awhile.  And then when I did see the nest it looked empty from my angle.  My husband, being taller, could see that there were actually three little eggs nestled inside.

It was fun having the ability to watch the nest because usually the nests we find are all up high.  I took pictures of the eggs and the babies about a week apart.  About a week after I took the one of the babies I peeked again and they looked pretty much the same.  So I thought I’d come back in a few days to look again but when I did they were already gone!  Amazing how little babies can grow up so fast.  Although the days of having 3 little ones of my own can seem very long at times I am glad they won’t be leaving our nest so quickly.

The first picture is of the momma.  Some birds are very protective and aggressive but every time we came near she would fly up to a nearby tree.  It surprised me that she’d leave her babies like that but maybe she thought they were hidden better without her sitting there.  She’s definitely keeping an eye on us in that picture making sure we don’t do any funny business.

I also thought it was fun that her nest had three little blue eggs like my logo.

mockingbird

mockingbird eggs mockingbird babies mockingbird babies

Gift Idea: American Girl Doll Sleeping Bag

american girl doll sleeping bag tutorial

We have friends who have twin girls who recently turned 9.  I have seen the girls a few times with American Girl dolls and for their birthday they asked to go camping.  So, I thought, why not make the dolls sleeping bags of their own so that the next time the family goes camping the dolls can get in on the fun too?

I did a quick search online to see what else had been done before and to find out the dimensions needed for 18″ dolls.  I came across a few sites but used this one as my main resource.  I followed the dimensions but didn’t follow the directions completely.  Although, maybe I should have since mine ended up being a bit bulky at the bottom corners.

american girl doll sleeping bag tutorial

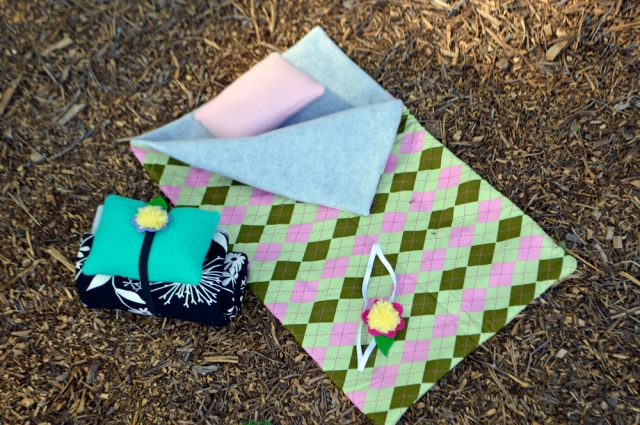
Basically, I cut out my two rectangles, sewed around the edge with right sides together.  (I used fleece for the inside and cotton for the outside.)  I turned it right side out and then folded it in half so that the fleece was on the outside.  To sew the open hole closed (that I used to turn the bag right side out) and turn the long rectangle into a sleeping bag all in one motion, I just tucked in the fabric at the hole and then sewed along the edge of the bag from about half way down and then across the bottom.

Then I just turned what now looks like a sleeping bag right side out so the cotton fabric was on the outside and it was finished.  I think the version I linked to is probably less bulky the way they did it but if I read the directions correctly it seemed you would see the raw edges of the seams on the inside of the bag which I didn’t want.

To help visualize what I just wrote here are some very basic drawings.  Hope they make it a little clearer.

sleeping bag tutorial step 1

sleeping bag tutorial step 2sleeping bag tutorial step 3

For the pillows I cut two rectangles of fleece 5″ x 6.5″.  And you just sew around the edges with the fabric right sides together.  Clip the corners, turn right side out, stuff, and then do a ladder stitch to close the opening.

I am pretty terrible about putting off sewing things until the day before they are given (even though I may have planned it and gotten the supplies well in advance) so this was a great project for that since you can’t get much easier than sewing some rectangles together.  The hardest part for me was finding some fabric in my stash that was big enough and I thought might fit their personalities.  The twins are very, very identical in their looks and general preferences but their dolls are not so I decided to give them different looking sleeping bags.

sleeping bag for 18 inch doll

To spruce up the look of the bags with a practical way of keeping all the pieces in place when not in use, I also sewed a piece of elastic in a loop (to figure out the size needed I just put the elastic around the rolled bag and pillow with a little bit of overlap) with a pretty flower on it.  If I had had my thinking cap on I would have sewn the elastic into the bottom seam of the bag like a real sleeping bag (like I showed in the instructions above) so that the elastic would always be attached and not get lost, but I didn’t think about it until I had finished the first one and I didn’t want the bags to be different in that way.

I cut out a flower and leaf from felt and made yellow yarn pom-pom and hand sewed them onto the elastic to hide where the two elastic ends met.

american girl doll sleeping bag diyI thought they turned out very cute and I loved the extra detail of the flower on the elastic.  It really made it look extra special.  I didn’t have a doll to try them on so I hope they fit, but hopefully they were fine.

This is a great sewing project for beginner sewers.  Please feel free to ask for any clarification if my instructions weren’t clear.

Does your household have any American Girl dolls in it, or other 18 inch dolls?  Have you made anything for them?  What are some other ideas that are cute and easy to help accessorize them?  My daughter is a bit young for them but I’m sure there will come a point when she’ll be into them.


New Print and New Size

I finally finished the latest print I’ve been working on!

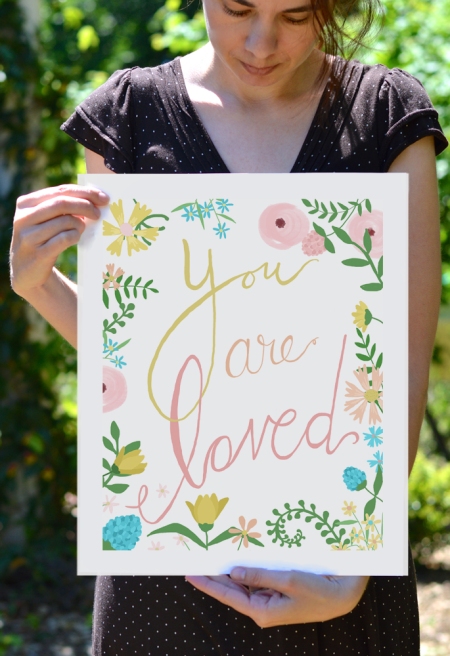
I love having tangible ways to share love with others.  It is wonderful to be able to tell those you love most how you feel with words and hugs but if you can’t see them everyday to do that, a beautiful picture can be a great reminder of how you feel.  This would make a great Mother’s Day gift.  Or it could be hung on the wall of your nursery.  It’s been hanging up at my house for the last week so I could take pictures of it and I’m really loving it.  The colors are so happy but also soothing at the same time if that is possible.  It may have to find a permanent home here or be given to someone who needs a little extra love.  You can find the print here in my shop.

I have other big news.  I am finally offering 11″x14″ sized prints!  I can make any print in the shop that size.  Just purchase this listing and let me know which one you want.  I am very excited to finally be able to offer this.  When I got my own printer last year I got a large format one so I could sell larger prints.  I had put it off because of the extra expenses that come with offering another size, but no longer!  I have two 11″x14″ prints over my kids’ twin beds and the size is nice and substantial, especially framed with a mat.  You can see the size in the picture below.  I leave a white border on my prints to make it easier to attach it to a mat.

11x14 size

I plan on offering an even larger size soon, so be on the look out!  And if you just can’t wait, feel free to contact me about details.

A Rainbow/Pony Birthday Party

Thought I’d share few photos from my daughter’s 4th birthday party.  We had decided on doing a rainbow birthday which I was happy about because it could be very simple to pull off and look cute. I prayed a ton for the weather to be nice since we’d have about 14 kids and having them outside running around would be much less stressful than being crammed in our house.  Thankfully, God was gracious and the weather was pretty perfect.  And crazily with the high being 80 that day, the next day it was wet and the high was probably 40.  It seems it is like that every year for my kids’ parties since they are in the spring and fall…one day it is lovely the next it is miserable…some years we get the good day and some years we don’t.  It makes it hard to know how to plan things.

I’ll go ahead and share the pictures here and if care to read more about the party and the simple ways I made it rainbow-iffic then you can read on afterwards!

Because we were doing rainbows, Audrey kept mentioning it was a Rainbow Dash party (which is a character from My Little Pony).  So, it morphed into being a pony party too.  I kept that part minimal or pretty non existent for the decorations but the Monday of her party I did see a picture of a child riding a pony on Pinterest and wondered why the idea of renting a pony to ride had never occurred to me.  I think it is because no one in our circle of friends has done that before so it wasn’t even on my radar.  Because it was unusual, it felt a bit indulgent, but really it cost about the same as doing a party at a jump house place which people do all the time around here.  The people we ended up using were great and very professional.  The pony was a little bigger than my original vision but it did allow for some of the older kids to ride which a shetland pony wouldn’t because there is like a 45 pound weight limit..or something like that.  This pony had over 100 pound weight limit. I just wanted something that wouldn’t be too huge and intimidating.  There were quite a few kids who were very scared at first but then loved it and the littlest ones seemed happy to avoid it.  But it was definitely a hit and worth the money.

To make it rainbow-y I hung streamers from the trees in our yard.  Our poor yard is pretty bare in March since everything is just thinking about waking up from winter so this added some nice color and was super easy.  Plus Audrey was able to help me with some lower areas.  We did this 20 minutes before the party started since it was super foggy and damp in the morning.

I had also made 3 of the easiest mobiles to hang from our pergola. I bought 3 embroidery hoops from hobby lobby and then just hung streamers in rainbow order from them.  The two hoops are what held the streamers in place and after the party was over I just pulled them out and can now use the hoops again for something else.  I tied yarn to the hoops and quickly hung them to the top of the pergola.  It was very simple but was very pretty blowing in the breeze.

I also used some foam core I had and drew a big 4 on it and cut it out.  I found tissue paper at The Dollar Tree that came in all the colors of the rainbow.  I cut the pieces in squares but didn’t worry about perfection and then hot glued them on.  Oh, and I figured out how big each stripe should be to make them equal and then measured that out and drew on the board since it would be covered up.  I did get burned a few times from the glue but it was a lot faster than trying to use regular white glue and I worried I wouldn’t have enough of that glue anyway.  I was very happy with how it turned out.  I ended up hanging it by a suction hook from our back window that had the table with presents, favors, and other stuff.

I also found a cute horseshoe game set at Hobby Lobby in their summer section.  It was originally around $6 or $7 but was on sale for 50% off.  All the pieces were different colors so it added to the rainbow and pony aspects!  And since it’s made from plastic I didn’t worry about anyone getting hurt from a rogue horseshoe!

My kids got a trampoline for Christmas and that was actually I think the biggest hit of the party.  The kids loved the pony but would have probably been equally happy just jumping the whole time.  We already had blueish/greenish ball years ago and I bought two more from Walmart for $2.50 each that were nice and big.  There was a yellow one with white polka dots and then a pink and orange one with a chevron pattern.  I threw them all on the trampoline to be bright and cheery while the kids jumped.

I almost forgot about the cake!   I kept it simple and bit of a surprise by buying a mix at the grocery store that had everything you needed to make it.  You could totally do it without it though by using your own food coloring.  I also ended up making two cakes so there would be enough for everyone.  I used my bundt cake pan so that when each slice was cut it’d be the shape of a rainbow.  After you make the batter you make six separate bowls of colored batter and then spoon them in one layer at a time.  If you don’t mess with it they stay separate and have nice bright rainbow colors inside.  I just frosted it white on the outside with some candles.  So it was pretty plain until I cut it and wowed everyone.  I had thought of putting one of her plastic ponies on it or next to it but ran out of time and decided it was fine simple.  I tend to mess things up, especially cakes, if I try to do too much.

And that was about it.  Some years I’ve gone a bit crazy with all the food options so this year to really try to keep it simple we went with pizza and some fruit.  The fruit was of course laid out in rainbow order of colors.  And somehow I didn’t take a picture of it.  I seem to always have grand plans of taking pictures and enjoying all the moments with everyone there but spend most of the time running around making sure it is all running smoothly.  Oh well, as long as everyone has a good time, then I am happy.  And I did leave out the pictures of all her friends because I hate to put them out on the internet without permission.

Next year’s party will definitely be more low key (or at least no horses). But it was fun making some great memories with the kids.

So, do you do birthday parties for your kids with friends and go all out?  Or maybe just a couple special friends?  Just family?  Have a favorite party that you’ve done in the past?  I’d love to hear!

Custom Baby Outfit Ornaments

custom bunny outfit

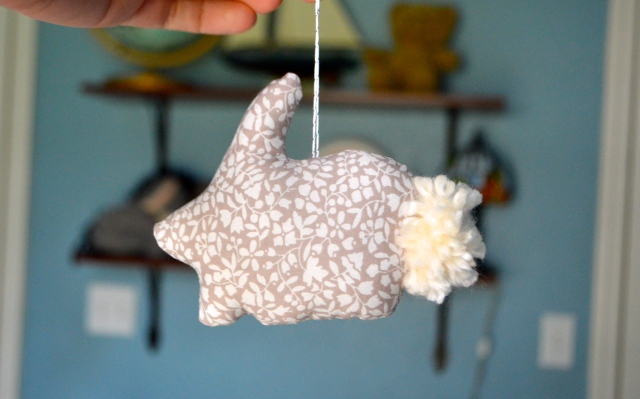
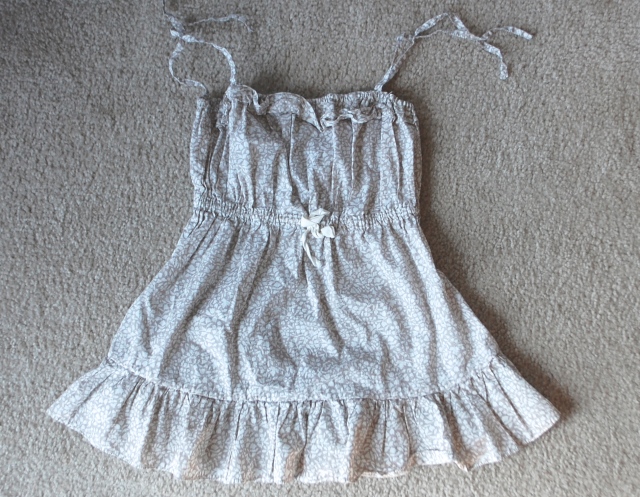
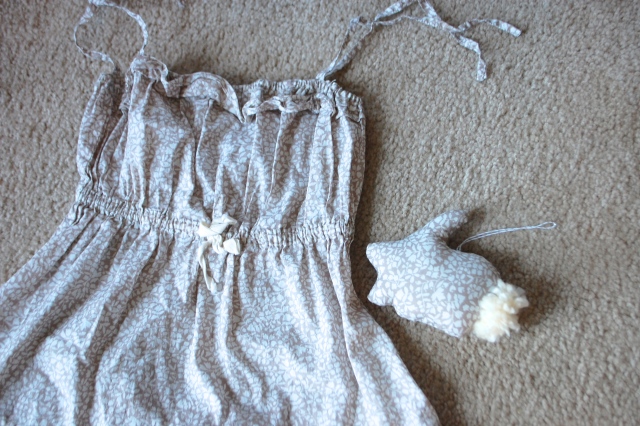
I was approached recently about making christmas ornaments from treasured baby clothes.  I thought it was a wonderful idea and just finished the first one.  This is a little bunny made from a sweet little dress.  I hated to cut it up to use, it was so cute!

DSC_0394

What a special way to remember those sweet baby outfits and actually see them.  We’ve kept a few of our kids cute outfits for them to look back at one day and see what they wore and how small they were but they are all sitting in a tub in our attic.  This way you actually get to display them.  This ornament along with others I’ll be making soon will be left without any wording on them and are intended to be used on the children’s little Christmas tree.  I’ll also be making a baby’s first christmas ornament from special baby clothes with words embroidered on it.  I’m looking forward to this project.  It’s nice to have something a bit different to work on especially without the stress and hectic-ness of the holiday season.

DSC_0397

I’ll share the others as I make them.  Question: would you rather keep your baby’s clothes intact or turn it into some time of special keepsake?

P.S.  Sorry for the lack of posts, I knew it had been a couple weeks but didn’t realize it had almost been a month!  Where does the time go?  We just celebrated my daughter’s fourth birthday with a rainbow/pony party so I’ll share a couple pictures from that and also my husband and oldest son just got back from a trip to Haiti so it’s been pretty non-stop around here!

Update on the Doll High Chair

Well, this is a bit embarrassing but I never gave an update to the doll high chair I bought back in December of 2011!  I’ve actually taken pictures of it twice since then to show you what I did but didn’t like the photos.

So, here is the before.

11 29 11_1727

And here is the after.

doll high chair

I was so torn with all the great color options out there and many of you gave beautiful suggestions on here and Facebook.  But in the end I went with red because I felt it was a classic color that would go with the period of the piece.  I also like that it isn’t too girly.

red high chair

lamb in doll chair

Of course it’s been so long now I can’t remember how much paint it took – either one or two cans.  I spray painted it slowly with lots of thin coats.  I also sanded it the best I could by hand before hand.  But boy was that a pain with all those little knobs. There seemed to be a little lacquer or sealer on part of it in the crevices which was really hard to get off so I just painted over it after having roughed it up and it covered it pretty well.

doll high chair

My daughter is finally at the age where she is enjoying playing with dolls and being mommy.  Last night she couldn’t go to sleep because she had taken a nap.  We could hear her awake until almost 10:30 and in the morning we discovered that she had been dressing all her stuffed animals, including the lamb in these pictures, with her doll clothes.  This is why we don’t let her nap anymore!

By the way, the little kitchen is what Santa brought Audrey last year.  We love it!  It looks so nice and is a great size.  We saw other kitchens that were really cute but when we saw the dimensions they were really short and didn’t seem like they’d would grow with a child.  We did have to put it in baby brother’s room because that was the only place it would fit, but he loves opening up all the doors and pulling out the play food.  I also love that it isn’t gender specific and doesn’t even scream kid so it’s easy on the eyes.

double photo